Skip to Main Content
Skip to Footer
Results loading, please wait
Recommendations
No Search Results Found for
Please refine your search.
Call 1 (800) 710-7499
|
Help
My Account
Results loading, please wait
No Search Results Found for
Please refine your search.
Cancel
Deliver to
63101
Change Location
GENERAC 10% OFF
Select Generac Home Standby Generators on Sale Now
Limited Time Offer
Offer Ends 05/01/24
Shop Now
FREE 7-YR WARRANTY*
With the Purchase, Installation, & Activation of a Qualifying Generac Standby Generator
*Must Redeem Online Through Generac
Offer Ends 05/12/24
Shop Now
Champion 10% Off
Save 10% on Select Home Standby Generators
Offer Ends 04/27/24
Shop Now
$250 GIFT CARD*
With the Purchase of 13kW, 22kW & 26kW Briggs & Stratton Standby Generators
*Must Send Form to Briggs & Stratton
Offer Ends 04/30/24
Shop Now
Champion 10% Off
Save 10% on Champion Portable Power Stations & Accessories
Offer Ends 04/27/24
Shop Now
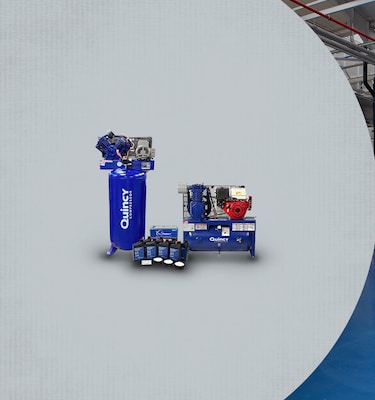
Quincy Spring Sale
Save up to $250 + Bonus FREE Maintenance Kit With Select Air Compressor Purchase
In-Stock Only
Offer Ends 04/30/24
Shop Now
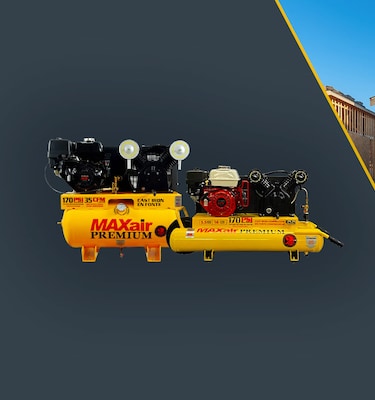
MAXair Spring Event
Save 15% on Select Gas Wheelbarrow & Truck Mount Air Compressors
While Supplies Last
Offer Ends 04/30/24
Shop Now
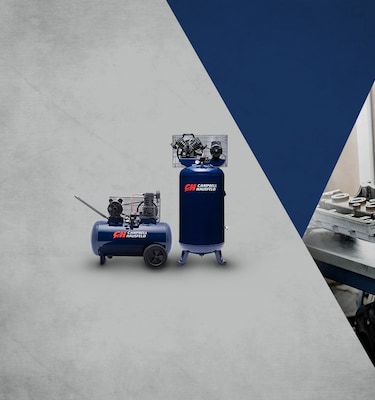
15% OFF Spring Sale
Save on Select Air Compressors from Campbell Hausfeld
While Supplies Last
Offer Ends 04/30/24
Shop Now
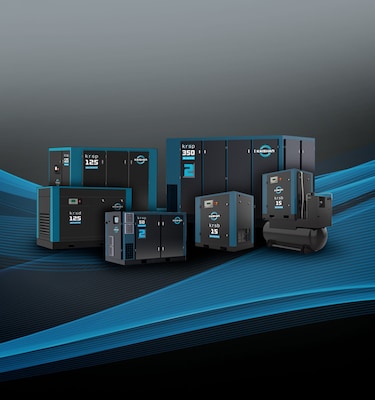
NOW AVAILABLE
Kaishan Air Compressors
Offer Ends
Shop Kaishan
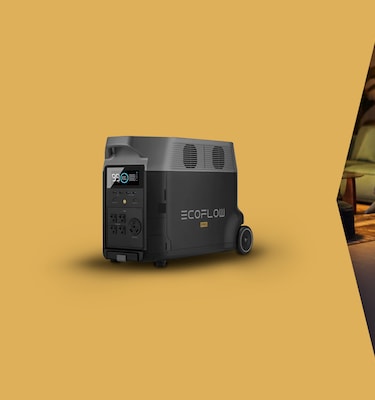
EcoFlow
Save Up To $400 on Select Portable Power Stations & Accessories
Offer Ends 04/20/24
Shop Now
NEW Referral Program
Refer New Customers & Get Rewarded - Up to $100 For Each New Customer Referral
Offer Ends
Start Referring Now
PREV
NEXT
QUICK SEARCH
Let's Find Power Equipment That Suits Your Needs
Dale,
Power Equipment Expert
Select Department
Air Compressors
Electric Generators
Power Tools
Pressure Washers
Sump Pumps
Water Pumps
Select Option
Select Option
Select Option
Select Option
Search Now
Dale,
Power Equipment Expert
Free Shipping
We offer free shipping on orders over $199 within the lower 48.
Learn More About Free Shipping
Expert Recommendations
Professional recommendations for the equipment you need backed by industry-leading knowledge.
Learn More About Expert Recommendations
Financing
Financing your power equipment has never been easier.
Learn More About Financing
TOP BRANDS
View All Brands
View All Brands
SHOP BY CATEGORY
Air Compressors
Generators
Pressure Washers
Sump Pumps
Water Pumps
BUYER'S GUIDES WRITTEN BY OUR EXPERTS
Visit How-to Library
Power Equipment Coupons
How to Save on Power Equipment Without Using Coupons
9 Ways to Get Your Home Ready for Fall
Fall Home Checklist
Get the Best Power Equipment in the Industry
Serious Power Equipment Worth Bragging About
Portable Outboard Motor Buyer's Guide
How to Pick the Perfect Portable Outboard Motor
Visit How-to Library
POPULAR CATEGORIES
Submersible Water Pumps
Portable Generators
Home Standby Generators
Power Tools
Inverter Generators
Outboard Motors
{"storeInfo":{"id":13,"name":"Power Equipment Direct","domain":"powerequipmentdirect.com","initials":"PED","url":"https:\/\/www.powerequipmentdirect.com","path":"\/var\/www\/vhosts\/ped.com\/"},"headerNavJSON":"{\"MainLinks\":[{\"URL\":\"\\\/outdoor\\\/air-compressors-direct.html\",\"displayText\":\"Air Compressors\",\"sectionLinks\":{\"columns\":\"6\",\"linkItems\":[{\"URL\":\"\\\/tools\\\/portable-air-compressors.html\",\"imageURL\":\"\\\/nav-image\\\/100\\\/compressor-13-1.jpg\",\"displayText\":\"Portable\"},{\"URL\":\"\\\/tools\\\/gas-air-compressors.html\",\"imageURL\":\"\\\/nav-image\\\/100\\\/compressor-13-2.jpg\",\"displayText\":\"Gas\"},{\"URL\":\"\\\/tools\\\/single-stage-air-compressors.html\",\"imageURL\":\"\\\/nav-image\\\/100\\\/compressor-13-3.jpg\",\"displayText\":\"Single-Stage\"},{\"URL\":\"\\\/tools\\\/two-stage-air-compressors.html\",\"imageURL\":\"\\\/nav-image\\\/100\\\/compressor-13-4.jpg\",\"displayText\":\"Two-Stage\"},{\"URL\":\"\\\/tools\\\/rotary-screw-air-compressors.html\",\"imageURL\":\"\\\/nav-image\\\/100\\\/compressor-13-5.jpg\",\"displayText\":\"Rotary Screw\"},{\"URL\":\"\\\/tools\\\/scroll-compressors.html\",\"imageURL\":\"\\\/nav-image\\\/100\\\/compressor-13-6.jpg\",\"displayText\":\"Scroll\"}]},\"subCategories\":[{\"URL\":null,\"type\":\"list\",\"title\":\"Featured Categories\",\"linkItems\":[{\"URL\":\"\\\/tools\\\/wheelbarrow-air-compressors.html\",\"displayText\":\"Wheelbarrow\"},{\"URL\":\"\\\/tools\\\/air-dryers.html\",\"displayText\":\"Air Dryers\"},{\"URL\":\"\\\/tools\\\/truck-mount-air-compressors.html\",\"displayText\":\"Truck Mount\"},{\"URL\":\"\\\/tools\\\/twin-stack-air-compressors.html\",\"displayText\":\"Twin Stack\"},{\"URL\":\"\\\/oil-free-air-compressors.html\",\"displayText\":\"Oil Free\"}]},{\"URL\":null,\"type\":\"list\",\"title\":\"Accessories\",\"linkItems\":[{\"URL\":\"\\\/tools\\\/impact-wrenches-pneumatic.html\",\"displayText\":\"Impact Wrenches\"},{\"URL\":\"\\\/tools\\\/air-treatment.html\",\"displayText\":\"Air Treatment\"},{\"URL\":\"\\\/tools\\\/air-tools.html\",\"displayText\":\"Air Tools\"},{\"URL\":\"\\\/tools\\\/air-compressor-accessories.html\",\"displayText\":\"All Accessories\"},{\"URL\":\"\\\/tools\\\/line-filters.html\",\"displayText\":\"Line Filters\"}]},{\"URL\":null,\"type\":\"list\",\"title\":\"Shop by Brand\",\"linkItems\":[{\"URL\":\"\\\/tools\\\/ingersoll-rand-air-compressors.html\",\"displayText\":\"Ingersoll Rand\"},{\"URL\":\"\\\/tools\\\/quincy-air-compressors.html\",\"displayText\":\"Quincy\"},{\"URL\":\"\\\/tools\\\/atlas-copco-compressors.html\",\"displayText\":\"Atlas Copco\"},{\"URL\":\"\\\/tools\\\/emax-air-compressors.html\",\"displayText\":\"EMAX\"},{\"URL\":\"\\\/tools\\\/industrial-air-compressors.html\",\"displayText\":\"Industrial Air\"}]},{\"URL\":\"\\\/stories\\\/156-How-to-Pick-the-Perfect-Air-Compressor.html\",\"type\":\"image\",\"title\":\"Buyer's Guide\",\"imageURL\":\"\\\/nav-article-image\\\/305\\\/social_img_156.jpg\",\"linkItems\":[],\"displayText\":\"The Ultimate Air Compressor Guide\"}]},{\"URL\":\"\\\/outdoor\\\/electric-generators-direct.html\",\"displayText\":\"Electric Generators\",\"sectionLinks\":{\"columns\":\"6\",\"linkItems\":[{\"URL\":\"\\\/power\\\/portable-generators.html\",\"imageURL\":\"\\\/nav-image\\\/100\\\/generator-13-1.jpg\",\"displayText\":\"Portable\"},{\"URL\":\"\\\/power\\\/home-standby-generators.html\",\"imageURL\":\"\\\/nav-image\\\/100\\\/generator-13-2.jpg\",\"displayText\":\"Home Standby\"},{\"URL\":\"\\\/power\\\/commercial-standby-generators.html\",\"imageURL\":\"\\\/nav-image\\\/100\\\/generator-13-3.jpg\",\"displayText\":\"Commercial\"},{\"URL\":\"\\\/power\\\/rv-generators.html\",\"imageURL\":\"\\\/nav-image\\\/100\\\/generator-13-4.jpg\",\"displayText\":\"RV\"},{\"URL\":\"\\\/power\\\/pto-generators.html\",\"imageURL\":\"\\\/nav-image\\\/100\\\/generator-13-5.jpg\",\"displayText\":\"PTO\"},{\"URL\":\"\\\/power\\\/transfer-switches.html\",\"imageURL\":\"\\\/nav-image\\\/100\\\/generator-13-6.jpg\",\"displayText\":\"Transfer Switches\"}]},\"subCategories\":[{\"URL\":null,\"type\":\"list\",\"title\":\"Featured Categories\",\"linkItems\":[{\"URL\":\"\\\/power\\\/whole-house-standby-generators.html\",\"displayText\":\"Whole House\"},{\"URL\":\"\\\/power\\\/inverter-generators.html\",\"displayText\":\"Inverter\"},{\"URL\":\"\\\/power\\\/electric-start-portable-generators.html\",\"displayText\":\"Electric Start\"},{\"URL\":\"\\\/power\\\/dual-fuel-generators.html\",\"displayText\":\"Dual Fuel\"},{\"URL\":\"\\\/power\\\/solar-generators.html\",\"displayText\":\"Solar Powered\"}]},{\"URL\":null,\"type\":\"list\",\"title\":\"Accessories\",\"linkItems\":[{\"URL\":\"\\\/power\\\/generator-power-cords.html\",\"displayText\":\"Power Cords\"},{\"URL\":\"\\\/power\\\/power-inlet-boxes.html\",\"displayText\":\"Power Inlet Boxes\"},{\"URL\":\"\\\/power\\\/generator-maintenance-kits.html\",\"displayText\":\"Maintenance Kits\"},{\"URL\":\"\\\/power\\\/portable-generator-covers.html\",\"displayText\":\"Covers & Tents\"},{\"URL\":\"\\\/outdoor\\\/electric-generator-accessories.html\",\"displayText\":\"All Accessories\"}]},{\"URL\":null,\"type\":\"list\",\"title\":\"Shop by Brand\",\"linkItems\":[{\"URL\":\"\\\/outdoor\\\/generac.html\",\"displayText\":\"Generac\"},{\"URL\":\"\\\/power\\\/honda-generators.html\",\"displayText\":\"Honda\"},{\"URL\":\"\\\/power\\\/kohler-generators.html\",\"displayText\":\"Kohler\"},{\"URL\":\"\\\/power\\\/briggs-and-stratton-generators.html\",\"displayText\":\"Briggs & Stratton\"},{\"URL\":\"\\\/power\\\/champion-generators.html\",\"displayText\":\"Champion\"}]},{\"URL\":\"\\\/stories\\\/305-How-to-Pick-the-Perfect-Electric-Generator.html\",\"type\":\"image\",\"title\":\"Buyer's Guide\",\"imageURL\":\"\\\/nav-article-image\\\/305\\\/social_img_305.jpg\",\"linkItems\":[],\"displayText\":\"What Kind of Generator do I Need for my House\"}]},{\"URL\":\"\\\/outdoor\\\/pressure-washers-direct.html\",\"displayText\":\"Pressure Washers\",\"sectionLinks\":{\"columns\":\"6\",\"linkItems\":[{\"URL\":\"\\\/power\\\/gas-pressure-washers.html\",\"imageURL\":\"\\\/nav-image\\\/100\\\/pressure-washer-13-1.jpg\",\"displayText\":\"Gas\"},{\"URL\":\"\\\/power\\\/electric-pressure-washers.html\",\"imageURL\":\"\\\/nav-image\\\/100\\\/pressure-washer-13-2.jpg\",\"displayText\":\"Electric\"},{\"URL\":\"\\\/power\\\/pressure-washer-pumps.html\",\"imageURL\":\"\\\/nav-image\\\/100\\\/pressure-washer-13-3.jpg\",\"displayText\":\"Pumps\"},{\"URL\":\"\\\/power\\\/pressure-washer-hoses.html\",\"imageURL\":\"\\\/nav-image\\\/100\\\/pressure-washer-13-4.jpg\",\"displayText\":\"Hoses\"},{\"URL\":\"\\\/power\\\/jetters.html\",\"imageURL\":\"\\\/nav-image\\\/100\\\/pressure-washer-13-5.jpg\",\"displayText\":\"Jetters\"},{\"URL\":\"\\\/power\\\/commercial-pressure-washers.html\",\"imageURL\":\"\\\/nav-image\\\/100\\\/pressure-washer-13-6.jpg\",\"displayText\":\"Commercial\"}]},\"subCategories\":[{\"URL\":null,\"type\":\"list\",\"title\":\"Featured Categories\",\"linkItems\":[{\"URL\":\"\\\/power\\\/commercial-start-your-own-business-kits.html\",\"displayText\":\"Business Kits\"},{\"URL\":\"\\\/power\\\/commercial-truck-mount-pressure-washers.html\",\"displayText\":\"Truck Mount\"},{\"URL\":\"\\\/power\\\/commercial-wall-mount-pressure-washers.html\",\"displayText\":\"Wall Mount\"},{\"URL\":\"\\\/power\\\/hot-water-pressure-washers.html\",\"displayText\":\"Hot Water\"},{\"URL\":\"\\\/power\\\/gas-pressure-washers.html\",\"displayText\":\"Gas Powered\"}]},{\"URL\":null,\"type\":\"list\",\"title\":\"Accessories\",\"linkItems\":[{\"URL\":\"\\\/power\\\/surface-cleaners.html\",\"displayText\":\"Surface Cleaners\"},{\"URL\":\"\\\/power\\\/pressure-washer-telescoping-wands.html\",\"displayText\":\"Telescoping Wands\"},{\"URL\":\"\\\/power\\\/pressure-washer-spray-rollers.html\",\"displayText\":\"Spray Guns\"},{\"URL\":\"\\\/power\\\/pressure-washer-soap-nozzles.html\",\"displayText\":\"Nozzles\"},{\"URL\":\"\\\/power\\\/pressure-washer-attachment.html\",\"displayText\":\"All Accessories\"}]},{\"URL\":null,\"type\":\"list\",\"title\":\"Shop by Brand\",\"linkItems\":[{\"URL\":\"\\\/power\\\/simpson-pressure-washers.html\",\"displayText\":\"Simpson\"},{\"URL\":\"\\\/power\\\/pressure-pro-pressure-washers.html\",\"displayText\":\"Pressure-Pro\"},{\"URL\":\"\\\/power\\\/be-pressure-washers.html\",\"displayText\":\"BE\"},{\"URL\":\"\\\/power\\\/general-pump-pressure-washers.html\",\"displayText\":\"General Pump\"},{\"URL\":\"\\\/power\\\/easy-kleen-pressure-washers.html\",\"displayText\":\"Easy-Kleen\"}]},{\"URL\":\"\\\/stories\\\/343-How-to-Pick-the-Perfect-Pressure-Washer.html\",\"type\":\"image\",\"title\":\"Buyer's Guide\",\"imageURL\":\"\\\/nav-article-image\\\/305\\\/social_img_343.jpg\",\"linkItems\":[],\"displayText\":\"Pressure Washer Buyer's Guide\"}]},{\"URL\":\"\\\/outdoor\\\/sump-pumps-direct.html\",\"displayText\":\"Sump Pumps\",\"sectionLinks\":{\"columns\":\"6\",\"linkItems\":[{\"URL\":\"\\\/pumps\\\/primary-sump-pumps.html\",\"imageURL\":\"\\\/nav-image\\\/100\\\/primary_56776234fd355c5a6971fc4fe3b1a559.jpg\",\"displayText\":\"Primary\"},{\"URL\":\"\\\/pumps\\\/combination-sump-pump-systems.html\",\"imageURL\":\"\\\/nav-image\\\/100\\\/Combination_d1accf365a102db5033f2a6f6bd37f98.jpg\",\"displayText\":\"Combination\"},{\"URL\":\"\\\/pumps\\\/battery-backup-sump-pumps.html\",\"imageURL\":\"\\\/nav-image\\\/100\\\/Battery Backup_57ed4885b879f30ee0134fc50cf51b8f.jpg\",\"displayText\":\"Battery Backup\"},{\"URL\":\"\\\/pumps\\\/sewage-pumps.html\",\"imageURL\":\"\\\/nav-image\\\/100\\\/Sewage_7c435fa06b22cee7de46cb44ef798ee7.jpg\",\"displayText\":\"Sewage\"},{\"URL\":\"\\\/pumps\\\/grinder-pumps.html\",\"imageURL\":\"\\\/nav-image\\\/100\\\/Grinder_74abf9c1c797dbdc6bdaedc569127969.jpg\",\"displayText\":\"Grinder\"},{\"URL\":\"\\\/pumps\\\/specialty-sump-pumps.html\",\"imageURL\":\"\\\/nav-image\\\/100\\\/Specialty_2e682b88db34300c4023504e9e23c845.jpg\",\"displayText\":\"Specialty\"}]},\"subCategories\":[{\"URL\":null,\"type\":\"list\",\"title\":\"Featured Categories\",\"linkItems\":[{\"URL\":\"\\\/pumps\\\/primary-submersible-sump-pumps.html\",\"displayText\":\"Primary Submersible\"},{\"URL\":\"\\\/pumps\\\/sewage-pump-systems.html\",\"displayText\":\"Sewage Systems\"},{\"URL\":\"\\\/pumps\\\/effluent-pumps.html\",\"displayText\":\"Effluent\"},{\"URL\":\"\\\/pumps\\\/laundry-drain-pump-systems.html\",\"displayText\":\"Drain\"},{\"URL\":\"\\\/pumps\\\/primary-pedestal-sump-pumps.html\",\"displayText\":\"Primary Pedestal\"}]},{\"URL\":null,\"type\":\"list\",\"title\":\"Accessories\",\"linkItems\":[{\"URL\":\"\\\/pumps\\\/sump-pump-batteries.html\",\"displayText\":\"Batteries\"},{\"URL\":\"\\\/pumps\\\/sump-pump-switches.html\",\"displayText\":\"Switches\"},{\"URL\":\"\\\/pumps\\\/sump-pump-and-sewage-pump-control-boxes.html\",\"displayText\":\"Control Boxes\"},{\"URL\":\"\\\/pumps\\\/auxiliary-power-systems.html\",\"displayText\":\"Auxiliary Power System\"},{\"URL\":\"\\\/pumps\\\/sump-pump-accessory.html\",\"displayText\":\"All Accessories\"}]},{\"URL\":null,\"type\":\"list\",\"title\":\"Shop by Brand\",\"linkItems\":[{\"URL\":\"\\\/pumps\\\/liberty-pumps.html\",\"displayText\":\"Liberty Pumps\"},{\"URL\":\"\\\/pumps\\\/zoeller-pumps.html\",\"displayText\":\"Zoeller\"},{\"URL\":\"\\\/pumps\\\/phcc-pro-series-pumps.html\",\"displayText\":\"Pro Series\"},{\"URL\":\"\\\/pumps\\\/bur-cam-pumps.html\",\"displayText\":\"Burcam\"},{\"URL\":\"\\\/pumps\\\/ion-pumps.html\",\"displayText\":\"iON Products\"}]},{\"URL\":\"\\\/stories\\\/784-Best-Selling-and-Top-Rated-Sump-Pumps.html\",\"type\":\"image\",\"title\":\"Buyer's Guide\",\"imageURL\":\"\\\/nav-article-image\\\/305\\\/social_img_784.jpg\",\"linkItems\":[],\"displayText\":\"The Best Sump Pumps of 2024\"}]},{\"URL\":\"\\\/outdoor\\\/water-pumps-direct.html\",\"displayText\":\"Water Pumps\",\"sectionLinks\":{\"columns\":\"6\",\"linkItems\":[{\"URL\":\"\\\/pumps\\\/electric-water-pumps.html\",\"imageURL\":\"\\\/nav-image\\\/100\\\/water-pump-13-1.jpg\",\"displayText\":\"Electric\"},{\"URL\":\"\\\/pumps\\\/gas-powered-water-pumps.html\",\"imageURL\":\"\\\/nav-image\\\/100\\\/water-pump-13-2.jpg\",\"displayText\":\"Gas\"},{\"URL\":\"\\\/pumps\\\/well-pumps.html\",\"imageURL\":\"\\\/nav-image\\\/100\\\/water-pump-13-3.jpg\",\"displayText\":\"Well\"},{\"URL\":\"\\\/pumps\\\/dewatering-pumps.html\",\"imageURL\":\"\\\/nav-image\\\/100\\\/water-pump-13-5.jpg\",\"displayText\":\"Dewatering\"},{\"URL\":\"\\\/pumps\\\/trash-pumps.html\",\"imageURL\":\"\\\/nav-image\\\/100\\\/water-pump-13-6.jpg\",\"displayText\":\"Trash\"},{\"URL\":\"\\\/pumps\\\/sprinkler-pumps.html\",\"imageURL\":\"\\\/nav-image\\\/100\\\/sprinkler_503ba4a09158d65372eb111aeb27c0b3.jpg\",\"displayText\":\"Sprinkler\"}]},\"subCategories\":[{\"URL\":null,\"type\":\"list\",\"title\":\"Featured Categories\",\"linkItems\":[{\"URL\":\"\\\/pumps\\\/utility-pumps.html\",\"displayText\":\"Utility\"},{\"URL\":\"\\\/pumps\\\/chemical-pumps.html\",\"displayText\":\"Chemical\"},{\"URL\":\"\\\/pumps\\\/transfer-pumps.html\",\"displayText\":\"Transfer\"},{\"URL\":\"\\\/pumps\\\/diesel-powered-pumps.html\",\"displayText\":\"Diesel\"},{\"URL\":\"\\\/pumps\\\/miscellaneous-power-types.html\",\"displayText\":\"Specialty Power\"}]},{\"URL\":null,\"type\":\"list\",\"title\":\"Accessories\",\"linkItems\":[{\"URL\":\"\\\/pumps\\\/water-pump-discharge-hoses.html\",\"displayText\":\"Hoses\"},{\"URL\":\"\\\/pumps\\\/well-pump-control-boxes.html\",\"displayText\":\"Control Boxes\"},{\"URL\":\"\\\/pumps\\\/float-switches.html\",\"displayText\":\"Switches\"},{\"URL\":\"\\\/pumps\\\/water-pump-quick-couplings.html\",\"displayText\":\"Quick Couplings\"},{\"URL\":\"\\\/pumps\\\/water-pump-accessory.html\",\"displayText\":\"All Accessories\"}]},{\"URL\":null,\"type\":\"list\",\"title\":\"Shop by Brand\",\"linkItems\":[{\"URL\":\"\\\/pumps\\\/honda-water-pumps.html\",\"displayText\":\"Honda\"},{\"URL\":\"\\\/pumps\\\/flotec-water-pumps.html\",\"displayText\":\"Flotec\"},{\"URL\":\"\\\/pumps\\\/multiquip-water-pumps.html\",\"displayText\":\"Multiquip\"},{\"URL\":\"\\\/pumps\\\/tsurumi-water-pumps.html\",\"displayText\":\"Tsurumi Pump\"},{\"URL\":\"\\\/pumps\\\/red-lion-water-pumps.html\",\"displayText\":\"Red Lion\"}]},{\"URL\":\"\\\/stories\\\/281-How-to-Pick-the-Perfect-Water-Pump.html\",\"type\":\"image\",\"title\":\"Buyer's Guide\",\"imageURL\":\"\\\/nav-article-image\\\/305\\\/social_img_281.jpg\",\"linkItems\":[],\"displayText\":\"Water Pump Buyer's Guide\"}]},{\"URL\":null,\"displayText\":\"More\",\"sectionLinks\":{\"columns\":\"6\",\"linkItems\":[{\"URL\":\"https:\\\/\\\/www.ecomfort.com\\\/cooling\\\/ductless-mini-split-systems.html\",\"imageURL\":\"\\\/nav-image\\\/100\\\/ls120hev2_99293_600_566a8b8447567d17e07268f4f6d958a4.jpg\",\"displayText\":\"Mini Splits\"},{\"URL\":\"https:\\\/\\\/www.ecomfort.com\\\/cooling\\\/room-air-conditioners.html\",\"imageURL\":\"\\\/nav-image\\\/100\\\/mass_140040_cd360daf61cd951f5221c80ff4941449.png\",\"displayText\":\"Room ACs and PTACs\"},{\"URL\":\"\\\/power\\\/jetters.html\",\"imageURL\":\"\\\/nav-image\\\/100\\\/JD4040HG_12827_600_72dcd6c01efe128e37c54c597bd42b59.jpg\",\"displayText\":\"Jetters\"},{\"URL\":\"\\\/outdoor\\\/paint-sprayers-direct.html\",\"imageURL\":\"\\\/nav-image\\\/100\\\/805-000_76239_1000_21900ab5e97ce4d1a242111121a10762_59ff9bc3ee387c5dd0131fb6cb89b426.jpg\",\"displayText\":\"Paint Sprayers\"}]},\"subCategories\":[{\"URL\":null,\"type\":\"list\",\"title\":\"Home Equipment\",\"linkItems\":[{\"URL\":\"https:\\\/\\\/www.ecomfort.com\\\/cooling\\\/central-air-conditioners.html\",\"displayText\":\"Air Conditioners\"},{\"URL\":\"https:\\\/\\\/www.ecomfort.com\\\/heating\\\/boilers.html\",\"displayText\":\"Boilers\"},{\"URL\":\"https:\\\/\\\/www.ecomfort.com\\\/heating\\\/furnaces.html\",\"displayText\":\"Furnaces\"},{\"URL\":\"https:\\\/\\\/www.ecomfort.com\\\/cooling\\\/ductless-mini-split-systems.html\",\"displayText\":\"Mini Splits\"},{\"URL\":\"https:\\\/\\\/www.ecomfort.com\\\/water-heaters\\\/water-heaters.html\",\"displayText\":\"Water Heaters\"}]},{\"URL\":null,\"type\":\"list\",\"title\":\"Home Appliances\",\"linkItems\":[{\"URL\":\"https:\\\/\\\/www.ecomfort.com\\\/cooling\\\/beverage-coolers.html\",\"displayText\":\"Beverage Coolers\"},{\"URL\":\"https:\\\/\\\/www.ecomfort.com\\\/appliances\\\/garbage-disposals.html\",\"displayText\":\"Garbage Disposals\"},{\"URL\":\"https:\\\/\\\/www.ecomfort.com\\\/cooling\\\/kegerators.html\",\"displayText\":\"Kegerators\"},{\"URL\":\"https:\\\/\\\/www.ecomfort.com\\\/cooling\\\/room-air-conditioners.html\",\"displayText\":\"Room Air Conditioners\"},{\"URL\":\"https:\\\/\\\/www.ecomfort.com\\\/cooling\\\/wine-coolers.html\",\"displayText\":\"Wine Coolers\"}]},{\"URL\":null,\"type\":\"list\",\"title\":\"Tools\",\"linkItems\":[{\"URL\":\"\\\/tools\\\/air-tools.html\",\"displayText\":\"Air Tools\"},{\"URL\":\"https:\\\/\\\/www.ecomfort.com\\\/cooling\\\/tools.html\",\"displayText\":\"HVAC Tools\"},{\"URL\":\"\\\/outdoor\\\/paint-sprayers-direct.html\",\"displayText\":\"Paint Sprayers\"}]},{\"URL\":null,\"type\":\"list\",\"title\":\"Commercial Equipment\",\"linkItems\":[{\"URL\":\"\\\/tools\\\/demolition-tools.html\",\"displayText\":\"Demolition Tools\"},{\"URL\":\"\\\/power\\\/jetters.html\",\"displayText\":\"Jetters\"},{\"URL\":\"\\\/power\\\/light-towers.html\",\"displayText\":\"Light Towers\"}]}]},{\"URL\":\"\\\/how-to-library.php\",\"displayText\":\"How-to-Library\",\"sectionLinks\":{\"columns\":\"6\",\"linkItems\":[{\"URL\":null,\"imageURL\":null,\"displayText\":\"\"}]},\"subCategories\":[]},{\"URL\":\"\\\/outdoor\\\/power-equipment-on-sale.html\",\"displayText\":\"Weekly Specials\",\"sectionLinks\":{\"columns\":\"6\",\"linkItems\":[{\"URL\":null,\"imageURL\":null,\"displayText\":\"\"}]},\"subCategories\":[]},{\"URL\":\"https:\\\/\\\/www.ecomfort.com\\\/\",\"displayText\":\"HVAC at eComfort.com\",\"sectionLinks\":{\"columns\":\"6\",\"linkItems\":[{\"URL\":null,\"imageURL\":null,\"displayText\":\"\"}]},\"subCategories\":[]}],\"USP\":[{\"id\":\"479\",\"URL\":\"\\\/stories\\\/479-How-To-Get-Free-Shipping-On-Power-Equipment.html\",\"className\":\"icon-nav-usp-shipping\",\"displayText\":\"Free Shipping\"},{\"id\":\"359\",\"URL\":\"\\\/stories\\\/359-Serious-Power-Equipment-Worth-Bragging-About.html\",\"className\":\"icon-nav-usp-reviews\",\"displayText\":\"Expert Recommendations\"},{\"id\":\"1261\",\"URL\":\"\\\/stories\\\/1261-Power-Equipment-Direct-Credit-Made-Simple.html\",\"className\":\"icon-nav-usp-financing\",\"displayText\":\"Financing\"},{\"id\":\"1991\",\"URL\":\"\\\/stories\\\/1991-New-Customer-Referral-Program.html\",\"className\":\"icon-referral\",\"displayText\":\"Customer Referral Program\"}]}","siteLinkJSON":"{\"Resources\":{\"How to Library\":{\"href\":\"how-to-library.php\",\"title\":\"Power Equipment Direct How-To Library\"},\"Product Reviews\":{\"href\":\"reviews.php\",\"title\":\"Customer Reviews on Power Equipment Direct Products\"},\"Recommendations\":{\"href\":\"stories\\\/359-Serious-Power-Equipment-Worth-Bragging-About.html\",\"title\":\"Product Recommendations\"},\"Weekly Specials\":{\"href\":\"outdoor\\\/power-equipment-on-sale.html\",\"title\":\"Weekly Power Equipment Direct Specials\"},\"Manuals\":{\"href\":\"stories\\\/399-How-to-Access-Old-Power-Equipment-Manuals.html\",\"title\":\"Manual Lookup\"},\"Service Centers\":{\"href\":\"stories\\\/414-How-to-Find-a-Service-Center-For-Your-Power-Equipment.html\",\"title\":\"Service Centers\"},\"Technical Support\":{\"href\":\"stories\\\/425-How-to-Find-Tech-Support-For-Your-Power-Equipment.html\",\"title\":\"Technical Support\"}},\"Account\":{\"My Account\":{\"href\":\"account.php\",\"title\":\"Login to My Account\"},\"Email Preferences\":{\"href\":\"https:\\\/\\\/www.powerequipmentdirect.com\\\/newsletter_removal.php\",\"title\":\"Email Preferences\"},\"Manufacturer Login\":{\"href\":\"https:\\\/\\\/www.powerequipmentdirect.com\\\/partnerships\\\/login.php\",\"title\":\"Manufacturer Login\"}},\"Customer Service\":{\"Help Center\":{\"href\":\"contact_us.php\",\"title\":\"Help Center\"},\"Return Policy\":{\"href\":\"returns.php\",\"title\":\"Return Policy\"},\"Shipping Policy\":{\"href\":\"stories\\\/515-How-to-Easily-Unload-Power-Equipment.html\",\"title\":\"Shipping Policy\"},\"Product Recalls\":{\"href\":\"stories\\\/1175-Product-Recalls-for-Power-Equipment.html\",\"title\":\"Product Recalls\"},\"Track Order\":{\"href\":\"ordertracking.php\",\"title\":\"Order Tracking\"},\"Accessibility\":{\"href\":\"stories\\\/1769-Our-Commitment-to-Accessibility.html\",\"title\":\"Accessibility\"},\"Do Not Sell or
Share My Personal Information\":{\"href\":\"https:\\\/\\\/ferguson.bigidprivacy.cloud\\\/consumer\\\/#\\\/dMf02ovZbN\\\/Form-NHWperWAaFNVIQK\",\"title\":\"Do Not Sell or Share My Personal Information\"}},\"About Us\":{\"Our Stores\":{\"href\":\"https:\\\/\\\/www.powerequipmentdirect.com\\\/our-stores.php\",\"title\":\"Power Equipment Direct's Stores\"},\"Our Story\":{\"href\":\"https:\\\/\\\/www.powerequipmentdirect.com\\\/stories\\\/1982-How-We-Make-Buying-Technical-Products-Simple.html\",\"title\":\"Power Equipment Direct's Story\"},\"Careers\":{\"href\":\"https:\\\/\\\/www.powerequipmentdirect.com\\\/stories\\\/1924-Job-Openings.html\",\"title\":\"Careers @ Power Equipment Direct\"},\"Newsroom\":{\"href\":\"newsreleases.php\",\"title\":\"Power Equipment Direct News Center\"}},\"Contact Us\":{\"phone\":\"800-710-7499\",\"hours\":[\"M-F: 8-5 CST\",\"Sat: Closed\",\"Sun: Closed\"]}}","storeLinkJSON":"{\"AC Wholesalers\":{\"href\":\"https:\\\/\\\/www.acwholesalers.com\",\"title\":\"AC Wholesalers\"},\"Air Compressors Direct\":{\"href\":\"https:\\\/\\\/www.aircompressorsdirect.com\",\"title\":\"Air Compressors Direct\"},\"Chain Saws Direct\":{\"href\":\"https:\\\/\\\/www.chainsawsdirect.com\",\"title\":\"Chain Saws Direct\"},\"Chippers Direct\":{\"href\":\"https:\\\/\\\/www.chippersdirect.com\",\"title\":\"Chippers Direct\"},\"eComfort\":{\"href\":\"https:\\\/\\\/www.ecomfort.com\",\"title\":\"eComfort\"},\"Electric Generators Direct\":{\"href\":\"https:\\\/\\\/www.electricgeneratorsdirect.com\",\"title\":\"Electric Generators Direct\"},\"Leaf Blowers Direct\":{\"href\":\"https:\\\/\\\/www.leafblowersdirect.com\",\"title\":\"Leaf Blowers Direct\"},\"Log Splitters Direct\":{\"href\":\"https:\\\/\\\/www.logsplittersdirect.com\",\"title\":\"Log Splitters Direct\"},\"Mowers Direct\":{\"href\":\"https:\\\/\\\/www.mowersdirect.com\",\"title\":\"Mowers Direct\"},\"Power Equipment Direct\":{\"href\":\"https:\\\/\\\/www.powerequipmentdirect.com\",\"title\":\"Power Equipment Direct\"},\"Pressure Washers Direct\":{\"href\":\"https:\\\/\\\/www.pressurewashersdirect.com\",\"title\":\"Pressure Washers Direct\"},\"Snow Blowers Direct\":{\"href\":\"https:\\\/\\\/www.snowblowersdirect.com\",\"title\":\"Snow Blowers Direct\"},\"String Trimmers Direct\":{\"href\":\"https:\\\/\\\/www.stringtrimmersdirect.com\",\"title\":\"String Trimmers Direct\"},\"Sump Pumps Direct\":{\"href\":\"https:\\\/\\\/www.sumppumpsdirect.com\",\"title\":\"Sump Pumps Direct\"},\"Tillers Direct\":{\"href\":\"https:\\\/\\\/www.tillersdirect.com\",\"title\":\"Tillers Direct\"},\"Water Pumps Direct\":{\"href\":\"https:\\\/\\\/www.waterpumpsdirect.com\",\"title\":\"Water Pumps Direct\"}}","socialLinkJSON":"{\"Facebook\":{\"href\":\"https:\\\/\\\/www.facebook.com\\\/PowerEquipmentDirect\",\"icon\":\"icon-facebook\",\"title\":\"Facebook\"},\"Twitter\":{\"href\":\"http:\\\/\\\/twitter.com\\\/PowerEquipment\",\"icon\":\"icon-twitter\",\"title\":\"Twitter\"},\"Pinterest\":{\"href\":\"http:\\\/\\\/pinterest.com\\\/powerequipment\\\/\",\"icon\":\"icon-pinterest\",\"title\":\"Pinterest\"},\"YouTube\":{\"href\":\"http:\\\/\\\/www.youtube.com\\\/PowerEquipmentDirect\",\"icon\":\"icon-youtube\",\"title\":\"YouTube\"},\"Instagram\":{\"href\":\"https:\\\/\\\/www.instagram.com\\\/powerequipmentdirect\\\/\",\"icon\":\"icon-instagram\",\"title\":\"Instagram\"},\"LinkedIn\":{\"href\":\"https:\\\/\\\/www.linkedin.com\\\/company\\\/power-equipment-direct\\\/about\\\/\",\"icon\":\"icon-linkedin\",\"title\":\"LinkedIn\"}}","miscLinkJSON":"{\"Terms of Use\":{\"href\":\"terms-of-use.php\",\"title\":\"Terms of Use\"},\"Privacy Policy & Security\":{\"href\":\"privacy.php\",\"title\":\"Privacy Policy and Security\"},\"Cookie Policy\":{\"href\":\"privacy.php#cookiePolicy\",\"title\":\"Cookie Policy\"},\"CA Privacy Rights\":{\"href\":\"privacy.php#californiaPrivacyRights\",\"title\":\"CA Privacy Rights\"},\"copyright\":\"© 2024 Power Equipment Direct. All Rights Reserved\"}","checkoutMiscLinkJSON":"{\"Privacy Policy & Security\":{\"href\":\"privacy.php\",\"title\":\"Privacy Policy and Security\"},\"Cookie Policy\":{\"href\":\"privacy.php#cookiePolicy\",\"title\":\"Cookie Policy\"},\"Terms of Use\":{\"href\":\"terms-of-use.php\",\"title\":\"Terms of Use\"},\"copyright\":\"© 2024 Power Equipment Direct. All Rights Reserved\"}","expertJSON":{"imageURL":"https:\/\/www.powerequipmentdirect.com\/images\/experts\/expert-main-13.png","href":"\/product-experts.php?s=13","title":"Contact Dale @ Power Equipment Direct","expertName":"Dale","expertTitle":"Power Equipment Expert"},"bbbJSON":{"imageURL":"https:\/\/www.powerequipmentdirect.com\/images\/badge-bbb.png","imageAlt":"Better Business Bureau\u00ae","href":"http:\/\/www.bbb.org\/chicago\/business-reviews\/industrial-equipment-and-supplies\/power-equipment-direct-in-bolingbrook-il-57001088","title":"Power Equipment Direct - A+ Rating - Better Business Bureau\u00ae"},"zipCode":null,"phoneNumber":"800-710-7499","loginToken":"6fd2b7589a6e4f7de74178d771418a5fdb656a69a53a20a48173d85af766290d","iterable":"e4b27e68b9c84fbb940829a0a9ee29d7","newNav":false}
We Make Buying Technical Products Simple
Free Shipping On Power Equipment
Lower 48
Free Shipping On Power Equipment
Lower 48
Compare
Clear All
{"storeInfo":{"id":13,"name":"Power Equipment Direct","domain":"powerequipmentdirect.com","initials":"PED","url":"https:\/\/www.powerequipmentdirect.com","path":"\/var\/www\/vhosts\/ped.com\/"},"headerNavJSON":"{\"MainLinks\":[{\"URL\":\"\\\/outdoor\\\/air-compressors-direct.html\",\"displayText\":\"Air Compressors\",\"sectionLinks\":{\"columns\":\"6\",\"linkItems\":[{\"URL\":\"\\\/tools\\\/portable-air-compressors.html\",\"imageURL\":\"\\\/nav-image\\\/100\\\/compressor-13-1.jpg\",\"displayText\":\"Portable\"},{\"URL\":\"\\\/tools\\\/gas-air-compressors.html\",\"imageURL\":\"\\\/nav-image\\\/100\\\/compressor-13-2.jpg\",\"displayText\":\"Gas\"},{\"URL\":\"\\\/tools\\\/single-stage-air-compressors.html\",\"imageURL\":\"\\\/nav-image\\\/100\\\/compressor-13-3.jpg\",\"displayText\":\"Single-Stage\"},{\"URL\":\"\\\/tools\\\/two-stage-air-compressors.html\",\"imageURL\":\"\\\/nav-image\\\/100\\\/compressor-13-4.jpg\",\"displayText\":\"Two-Stage\"},{\"URL\":\"\\\/tools\\\/rotary-screw-air-compressors.html\",\"imageURL\":\"\\\/nav-image\\\/100\\\/compressor-13-5.jpg\",\"displayText\":\"Rotary Screw\"},{\"URL\":\"\\\/tools\\\/scroll-compressors.html\",\"imageURL\":\"\\\/nav-image\\\/100\\\/compressor-13-6.jpg\",\"displayText\":\"Scroll\"}]},\"subCategories\":[{\"URL\":null,\"type\":\"list\",\"title\":\"Featured Categories\",\"linkItems\":[{\"URL\":\"\\\/tools\\\/wheelbarrow-air-compressors.html\",\"displayText\":\"Wheelbarrow\"},{\"URL\":\"\\\/tools\\\/air-dryers.html\",\"displayText\":\"Air Dryers\"},{\"URL\":\"\\\/tools\\\/truck-mount-air-compressors.html\",\"displayText\":\"Truck Mount\"},{\"URL\":\"\\\/tools\\\/twin-stack-air-compressors.html\",\"displayText\":\"Twin Stack\"},{\"URL\":\"\\\/oil-free-air-compressors.html\",\"displayText\":\"Oil Free\"}]},{\"URL\":null,\"type\":\"list\",\"title\":\"Accessories\",\"linkItems\":[{\"URL\":\"\\\/tools\\\/impact-wrenches-pneumatic.html\",\"displayText\":\"Impact Wrenches\"},{\"URL\":\"\\\/tools\\\/air-treatment.html\",\"displayText\":\"Air Treatment\"},{\"URL\":\"\\\/tools\\\/air-tools.html\",\"displayText\":\"Air Tools\"},{\"URL\":\"\\\/tools\\\/air-compressor-accessories.html\",\"displayText\":\"All Accessories\"},{\"URL\":\"\\\/tools\\\/line-filters.html\",\"displayText\":\"Line Filters\"}]},{\"URL\":null,\"type\":\"list\",\"title\":\"Shop by Brand\",\"linkItems\":[{\"URL\":\"\\\/tools\\\/ingersoll-rand-air-compressors.html\",\"displayText\":\"Ingersoll Rand\"},{\"URL\":\"\\\/tools\\\/quincy-air-compressors.html\",\"displayText\":\"Quincy\"},{\"URL\":\"\\\/tools\\\/atlas-copco-compressors.html\",\"displayText\":\"Atlas Copco\"},{\"URL\":\"\\\/tools\\\/emax-air-compressors.html\",\"displayText\":\"EMAX\"},{\"URL\":\"\\\/tools\\\/industrial-air-compressors.html\",\"displayText\":\"Industrial Air\"}]},{\"URL\":\"\\\/stories\\\/156-How-to-Pick-the-Perfect-Air-Compressor.html\",\"type\":\"image\",\"title\":\"Buyer's Guide\",\"imageURL\":\"\\\/nav-article-image\\\/305\\\/social_img_156.jpg\",\"linkItems\":[],\"displayText\":\"The Ultimate Air Compressor Guide\"}]},{\"URL\":\"\\\/outdoor\\\/electric-generators-direct.html\",\"displayText\":\"Electric Generators\",\"sectionLinks\":{\"columns\":\"6\",\"linkItems\":[{\"URL\":\"\\\/power\\\/portable-generators.html\",\"imageURL\":\"\\\/nav-image\\\/100\\\/generator-13-1.jpg\",\"displayText\":\"Portable\"},{\"URL\":\"\\\/power\\\/home-standby-generators.html\",\"imageURL\":\"\\\/nav-image\\\/100\\\/generator-13-2.jpg\",\"displayText\":\"Home Standby\"},{\"URL\":\"\\\/power\\\/commercial-standby-generators.html\",\"imageURL\":\"\\\/nav-image\\\/100\\\/generator-13-3.jpg\",\"displayText\":\"Commercial\"},{\"URL\":\"\\\/power\\\/rv-generators.html\",\"imageURL\":\"\\\/nav-image\\\/100\\\/generator-13-4.jpg\",\"displayText\":\"RV\"},{\"URL\":\"\\\/power\\\/pto-generators.html\",\"imageURL\":\"\\\/nav-image\\\/100\\\/generator-13-5.jpg\",\"displayText\":\"PTO\"},{\"URL\":\"\\\/power\\\/transfer-switches.html\",\"imageURL\":\"\\\/nav-image\\\/100\\\/generator-13-6.jpg\",\"displayText\":\"Transfer Switches\"}]},\"subCategories\":[{\"URL\":null,\"type\":\"list\",\"title\":\"Featured Categories\",\"linkItems\":[{\"URL\":\"\\\/power\\\/whole-house-standby-generators.html\",\"displayText\":\"Whole House\"},{\"URL\":\"\\\/power\\\/inverter-generators.html\",\"displayText\":\"Inverter\"},{\"URL\":\"\\\/power\\\/electric-start-portable-generators.html\",\"displayText\":\"Electric Start\"},{\"URL\":\"\\\/power\\\/dual-fuel-generators.html\",\"displayText\":\"Dual Fuel\"},{\"URL\":\"\\\/power\\\/solar-generators.html\",\"displayText\":\"Solar Powered\"}]},{\"URL\":null,\"type\":\"list\",\"title\":\"Accessories\",\"linkItems\":[{\"URL\":\"\\\/power\\\/generator-power-cords.html\",\"displayText\":\"Power Cords\"},{\"URL\":\"\\\/power\\\/power-inlet-boxes.html\",\"displayText\":\"Power Inlet Boxes\"},{\"URL\":\"\\\/power\\\/generator-maintenance-kits.html\",\"displayText\":\"Maintenance Kits\"},{\"URL\":\"\\\/power\\\/portable-generator-covers.html\",\"displayText\":\"Covers & Tents\"},{\"URL\":\"\\\/outdoor\\\/electric-generator-accessories.html\",\"displayText\":\"All Accessories\"}]},{\"URL\":null,\"type\":\"list\",\"title\":\"Shop by Brand\",\"linkItems\":[{\"URL\":\"\\\/outdoor\\\/generac.html\",\"displayText\":\"Generac\"},{\"URL\":\"\\\/power\\\/honda-generators.html\",\"displayText\":\"Honda\"},{\"URL\":\"\\\/power\\\/kohler-generators.html\",\"displayText\":\"Kohler\"},{\"URL\":\"\\\/power\\\/briggs-and-stratton-generators.html\",\"displayText\":\"Briggs & Stratton\"},{\"URL\":\"\\\/power\\\/champion-generators.html\",\"displayText\":\"Champion\"}]},{\"URL\":\"\\\/stories\\\/305-How-to-Pick-the-Perfect-Electric-Generator.html\",\"type\":\"image\",\"title\":\"Buyer's Guide\",\"imageURL\":\"\\\/nav-article-image\\\/305\\\/social_img_305.jpg\",\"linkItems\":[],\"displayText\":\"What Kind of Generator do I Need for my House\"}]},{\"URL\":\"\\\/outdoor\\\/pressure-washers-direct.html\",\"displayText\":\"Pressure Washers\",\"sectionLinks\":{\"columns\":\"6\",\"linkItems\":[{\"URL\":\"\\\/power\\\/gas-pressure-washers.html\",\"imageURL\":\"\\\/nav-image\\\/100\\\/pressure-washer-13-1.jpg\",\"displayText\":\"Gas\"},{\"URL\":\"\\\/power\\\/electric-pressure-washers.html\",\"imageURL\":\"\\\/nav-image\\\/100\\\/pressure-washer-13-2.jpg\",\"displayText\":\"Electric\"},{\"URL\":\"\\\/power\\\/pressure-washer-pumps.html\",\"imageURL\":\"\\\/nav-image\\\/100\\\/pressure-washer-13-3.jpg\",\"displayText\":\"Pumps\"},{\"URL\":\"\\\/power\\\/pressure-washer-hoses.html\",\"imageURL\":\"\\\/nav-image\\\/100\\\/pressure-washer-13-4.jpg\",\"displayText\":\"Hoses\"},{\"URL\":\"\\\/power\\\/jetters.html\",\"imageURL\":\"\\\/nav-image\\\/100\\\/pressure-washer-13-5.jpg\",\"displayText\":\"Jetters\"},{\"URL\":\"\\\/power\\\/commercial-pressure-washers.html\",\"imageURL\":\"\\\/nav-image\\\/100\\\/pressure-washer-13-6.jpg\",\"displayText\":\"Commercial\"}]},\"subCategories\":[{\"URL\":null,\"type\":\"list\",\"title\":\"Featured Categories\",\"linkItems\":[{\"URL\":\"\\\/power\\\/commercial-start-your-own-business-kits.html\",\"displayText\":\"Business Kits\"},{\"URL\":\"\\\/power\\\/commercial-truck-mount-pressure-washers.html\",\"displayText\":\"Truck Mount\"},{\"URL\":\"\\\/power\\\/commercial-wall-mount-pressure-washers.html\",\"displayText\":\"Wall Mount\"},{\"URL\":\"\\\/power\\\/hot-water-pressure-washers.html\",\"displayText\":\"Hot Water\"},{\"URL\":\"\\\/power\\\/gas-pressure-washers.html\",\"displayText\":\"Gas Powered\"}]},{\"URL\":null,\"type\":\"list\",\"title\":\"Accessories\",\"linkItems\":[{\"URL\":\"\\\/power\\\/surface-cleaners.html\",\"displayText\":\"Surface Cleaners\"},{\"URL\":\"\\\/power\\\/pressure-washer-telescoping-wands.html\",\"displayText\":\"Telescoping Wands\"},{\"URL\":\"\\\/power\\\/pressure-washer-spray-rollers.html\",\"displayText\":\"Spray Guns\"},{\"URL\":\"\\\/power\\\/pressure-washer-soap-nozzles.html\",\"displayText\":\"Nozzles\"},{\"URL\":\"\\\/power\\\/pressure-washer-attachment.html\",\"displayText\":\"All Accessories\"}]},{\"URL\":null,\"type\":\"list\",\"title\":\"Shop by Brand\",\"linkItems\":[{\"URL\":\"\\\/power\\\/simpson-pressure-washers.html\",\"displayText\":\"Simpson\"},{\"URL\":\"\\\/power\\\/pressure-pro-pressure-washers.html\",\"displayText\":\"Pressure-Pro\"},{\"URL\":\"\\\/power\\\/be-pressure-washers.html\",\"displayText\":\"BE\"},{\"URL\":\"\\\/power\\\/general-pump-pressure-washers.html\",\"displayText\":\"General Pump\"},{\"URL\":\"\\\/power\\\/easy-kleen-pressure-washers.html\",\"displayText\":\"Easy-Kleen\"}]},{\"URL\":\"\\\/stories\\\/343-How-to-Pick-the-Perfect-Pressure-Washer.html\",\"type\":\"image\",\"title\":\"Buyer's Guide\",\"imageURL\":\"\\\/nav-article-image\\\/305\\\/social_img_343.jpg\",\"linkItems\":[],\"displayText\":\"Pressure Washer Buyer's Guide\"}]},{\"URL\":\"\\\/outdoor\\\/sump-pumps-direct.html\",\"displayText\":\"Sump Pumps\",\"sectionLinks\":{\"columns\":\"6\",\"linkItems\":[{\"URL\":\"\\\/pumps\\\/primary-sump-pumps.html\",\"imageURL\":\"\\\/nav-image\\\/100\\\/primary_56776234fd355c5a6971fc4fe3b1a559.jpg\",\"displayText\":\"Primary\"},{\"URL\":\"\\\/pumps\\\/combination-sump-pump-systems.html\",\"imageURL\":\"\\\/nav-image\\\/100\\\/Combination_d1accf365a102db5033f2a6f6bd37f98.jpg\",\"displayText\":\"Combination\"},{\"URL\":\"\\\/pumps\\\/battery-backup-sump-pumps.html\",\"imageURL\":\"\\\/nav-image\\\/100\\\/Battery Backup_57ed4885b879f30ee0134fc50cf51b8f.jpg\",\"displayText\":\"Battery Backup\"},{\"URL\":\"\\\/pumps\\\/sewage-pumps.html\",\"imageURL\":\"\\\/nav-image\\\/100\\\/Sewage_7c435fa06b22cee7de46cb44ef798ee7.jpg\",\"displayText\":\"Sewage\"},{\"URL\":\"\\\/pumps\\\/grinder-pumps.html\",\"imageURL\":\"\\\/nav-image\\\/100\\\/Grinder_74abf9c1c797dbdc6bdaedc569127969.jpg\",\"displayText\":\"Grinder\"},{\"URL\":\"\\\/pumps\\\/specialty-sump-pumps.html\",\"imageURL\":\"\\\/nav-image\\\/100\\\/Specialty_2e682b88db34300c4023504e9e23c845.jpg\",\"displayText\":\"Specialty\"}]},\"subCategories\":[{\"URL\":null,\"type\":\"list\",\"title\":\"Featured Categories\",\"linkItems\":[{\"URL\":\"\\\/pumps\\\/primary-submersible-sump-pumps.html\",\"displayText\":\"Primary Submersible\"},{\"URL\":\"\\\/pumps\\\/sewage-pump-systems.html\",\"displayText\":\"Sewage Systems\"},{\"URL\":\"\\\/pumps\\\/effluent-pumps.html\",\"displayText\":\"Effluent\"},{\"URL\":\"\\\/pumps\\\/laundry-drain-pump-systems.html\",\"displayText\":\"Drain\"},{\"URL\":\"\\\/pumps\\\/primary-pedestal-sump-pumps.html\",\"displayText\":\"Primary Pedestal\"}]},{\"URL\":null,\"type\":\"list\",\"title\":\"Accessories\",\"linkItems\":[{\"URL\":\"\\\/pumps\\\/sump-pump-batteries.html\",\"displayText\":\"Batteries\"},{\"URL\":\"\\\/pumps\\\/sump-pump-switches.html\",\"displayText\":\"Switches\"},{\"URL\":\"\\\/pumps\\\/sump-pump-and-sewage-pump-control-boxes.html\",\"displayText\":\"Control Boxes\"},{\"URL\":\"\\\/pumps\\\/auxiliary-power-systems.html\",\"displayText\":\"Auxiliary Power System\"},{\"URL\":\"\\\/pumps\\\/sump-pump-accessory.html\",\"displayText\":\"All Accessories\"}]},{\"URL\":null,\"type\":\"list\",\"title\":\"Shop by Brand\",\"linkItems\":[{\"URL\":\"\\\/pumps\\\/liberty-pumps.html\",\"displayText\":\"Liberty Pumps\"},{\"URL\":\"\\\/pumps\\\/zoeller-pumps.html\",\"displayText\":\"Zoeller\"},{\"URL\":\"\\\/pumps\\\/phcc-pro-series-pumps.html\",\"displayText\":\"Pro Series\"},{\"URL\":\"\\\/pumps\\\/bur-cam-pumps.html\",\"displayText\":\"Burcam\"},{\"URL\":\"\\\/pumps\\\/ion-pumps.html\",\"displayText\":\"iON Products\"}]},{\"URL\":\"\\\/stories\\\/784-Best-Selling-and-Top-Rated-Sump-Pumps.html\",\"type\":\"image\",\"title\":\"Buyer's Guide\",\"imageURL\":\"\\\/nav-article-image\\\/305\\\/social_img_784.jpg\",\"linkItems\":[],\"displayText\":\"The Best Sump Pumps of 2024\"}]},{\"URL\":\"\\\/outdoor\\\/water-pumps-direct.html\",\"displayText\":\"Water Pumps\",\"sectionLinks\":{\"columns\":\"6\",\"linkItems\":[{\"URL\":\"\\\/pumps\\\/electric-water-pumps.html\",\"imageURL\":\"\\\/nav-image\\\/100\\\/water-pump-13-1.jpg\",\"displayText\":\"Electric\"},{\"URL\":\"\\\/pumps\\\/gas-powered-water-pumps.html\",\"imageURL\":\"\\\/nav-image\\\/100\\\/water-pump-13-2.jpg\",\"displayText\":\"Gas\"},{\"URL\":\"\\\/pumps\\\/well-pumps.html\",\"imageURL\":\"\\\/nav-image\\\/100\\\/water-pump-13-3.jpg\",\"displayText\":\"Well\"},{\"URL\":\"\\\/pumps\\\/dewatering-pumps.html\",\"imageURL\":\"\\\/nav-image\\\/100\\\/water-pump-13-5.jpg\",\"displayText\":\"Dewatering\"},{\"URL\":\"\\\/pumps\\\/trash-pumps.html\",\"imageURL\":\"\\\/nav-image\\\/100\\\/water-pump-13-6.jpg\",\"displayText\":\"Trash\"},{\"URL\":\"\\\/pumps\\\/sprinkler-pumps.html\",\"imageURL\":\"\\\/nav-image\\\/100\\\/sprinkler_503ba4a09158d65372eb111aeb27c0b3.jpg\",\"displayText\":\"Sprinkler\"}]},\"subCategories\":[{\"URL\":null,\"type\":\"list\",\"title\":\"Featured Categories\",\"linkItems\":[{\"URL\":\"\\\/pumps\\\/utility-pumps.html\",\"displayText\":\"Utility\"},{\"URL\":\"\\\/pumps\\\/chemical-pumps.html\",\"displayText\":\"Chemical\"},{\"URL\":\"\\\/pumps\\\/transfer-pumps.html\",\"displayText\":\"Transfer\"},{\"URL\":\"\\\/pumps\\\/diesel-powered-pumps.html\",\"displayText\":\"Diesel\"},{\"URL\":\"\\\/pumps\\\/miscellaneous-power-types.html\",\"displayText\":\"Specialty Power\"}]},{\"URL\":null,\"type\":\"list\",\"title\":\"Accessories\",\"linkItems\":[{\"URL\":\"\\\/pumps\\\/water-pump-discharge-hoses.html\",\"displayText\":\"Hoses\"},{\"URL\":\"\\\/pumps\\\/well-pump-control-boxes.html\",\"displayText\":\"Control Boxes\"},{\"URL\":\"\\\/pumps\\\/float-switches.html\",\"displayText\":\"Switches\"},{\"URL\":\"\\\/pumps\\\/water-pump-quick-couplings.html\",\"displayText\":\"Quick Couplings\"},{\"URL\":\"\\\/pumps\\\/water-pump-accessory.html\",\"displayText\":\"All Accessories\"}]},{\"URL\":null,\"type\":\"list\",\"title\":\"Shop by Brand\",\"linkItems\":[{\"URL\":\"\\\/pumps\\\/honda-water-pumps.html\",\"displayText\":\"Honda\"},{\"URL\":\"\\\/pumps\\\/flotec-water-pumps.html\",\"displayText\":\"Flotec\"},{\"URL\":\"\\\/pumps\\\/multiquip-water-pumps.html\",\"displayText\":\"Multiquip\"},{\"URL\":\"\\\/pumps\\\/tsurumi-water-pumps.html\",\"displayText\":\"Tsurumi Pump\"},{\"URL\":\"\\\/pumps\\\/red-lion-water-pumps.html\",\"displayText\":\"Red Lion\"}]},{\"URL\":\"\\\/stories\\\/281-How-to-Pick-the-Perfect-Water-Pump.html\",\"type\":\"image\",\"title\":\"Buyer's Guide\",\"imageURL\":\"\\\/nav-article-image\\\/305\\\/social_img_281.jpg\",\"linkItems\":[],\"displayText\":\"Water Pump Buyer's Guide\"}]},{\"URL\":null,\"displayText\":\"More\",\"sectionLinks\":{\"columns\":\"6\",\"linkItems\":[{\"URL\":\"https:\\\/\\\/www.ecomfort.com\\\/cooling\\\/ductless-mini-split-systems.html\",\"imageURL\":\"\\\/nav-image\\\/100\\\/ls120hev2_99293_600_566a8b8447567d17e07268f4f6d958a4.jpg\",\"displayText\":\"Mini Splits\"},{\"URL\":\"https:\\\/\\\/www.ecomfort.com\\\/cooling\\\/room-air-conditioners.html\",\"imageURL\":\"\\\/nav-image\\\/100\\\/mass_140040_cd360daf61cd951f5221c80ff4941449.png\",\"displayText\":\"Room ACs and PTACs\"},{\"URL\":\"\\\/power\\\/jetters.html\",\"imageURL\":\"\\\/nav-image\\\/100\\\/JD4040HG_12827_600_72dcd6c01efe128e37c54c597bd42b59.jpg\",\"displayText\":\"Jetters\"},{\"URL\":\"\\\/outdoor\\\/paint-sprayers-direct.html\",\"imageURL\":\"\\\/nav-image\\\/100\\\/805-000_76239_1000_21900ab5e97ce4d1a242111121a10762_59ff9bc3ee387c5dd0131fb6cb89b426.jpg\",\"displayText\":\"Paint Sprayers\"}]},\"subCategories\":[{\"URL\":null,\"type\":\"list\",\"title\":\"Home Equipment\",\"linkItems\":[{\"URL\":\"https:\\\/\\\/www.ecomfort.com\\\/cooling\\\/central-air-conditioners.html\",\"displayText\":\"Air Conditioners\"},{\"URL\":\"https:\\\/\\\/www.ecomfort.com\\\/heating\\\/boilers.html\",\"displayText\":\"Boilers\"},{\"URL\":\"https:\\\/\\\/www.ecomfort.com\\\/heating\\\/furnaces.html\",\"displayText\":\"Furnaces\"},{\"URL\":\"https:\\\/\\\/www.ecomfort.com\\\/cooling\\\/ductless-mini-split-systems.html\",\"displayText\":\"Mini Splits\"},{\"URL\":\"https:\\\/\\\/www.ecomfort.com\\\/water-heaters\\\/water-heaters.html\",\"displayText\":\"Water Heaters\"}]},{\"URL\":null,\"type\":\"list\",\"title\":\"Home Appliances\",\"linkItems\":[{\"URL\":\"https:\\\/\\\/www.ecomfort.com\\\/cooling\\\/beverage-coolers.html\",\"displayText\":\"Beverage Coolers\"},{\"URL\":\"https:\\\/\\\/www.ecomfort.com\\\/appliances\\\/garbage-disposals.html\",\"displayText\":\"Garbage Disposals\"},{\"URL\":\"https:\\\/\\\/www.ecomfort.com\\\/cooling\\\/kegerators.html\",\"displayText\":\"Kegerators\"},{\"URL\":\"https:\\\/\\\/www.ecomfort.com\\\/cooling\\\/room-air-conditioners.html\",\"displayText\":\"Room Air Conditioners\"},{\"URL\":\"https:\\\/\\\/www.ecomfort.com\\\/cooling\\\/wine-coolers.html\",\"displayText\":\"Wine Coolers\"}]},{\"URL\":null,\"type\":\"list\",\"title\":\"Tools\",\"linkItems\":[{\"URL\":\"\\\/tools\\\/air-tools.html\",\"displayText\":\"Air Tools\"},{\"URL\":\"https:\\\/\\\/www.ecomfort.com\\\/cooling\\\/tools.html\",\"displayText\":\"HVAC Tools\"},{\"URL\":\"\\\/outdoor\\\/paint-sprayers-direct.html\",\"displayText\":\"Paint Sprayers\"}]},{\"URL\":null,\"type\":\"list\",\"title\":\"Commercial Equipment\",\"linkItems\":[{\"URL\":\"\\\/tools\\\/demolition-tools.html\",\"displayText\":\"Demolition Tools\"},{\"URL\":\"\\\/power\\\/jetters.html\",\"displayText\":\"Jetters\"},{\"URL\":\"\\\/power\\\/light-towers.html\",\"displayText\":\"Light Towers\"}]}]},{\"URL\":\"\\\/how-to-library.php\",\"displayText\":\"How-to-Library\",\"sectionLinks\":{\"columns\":\"6\",\"linkItems\":[{\"URL\":null,\"imageURL\":null,\"displayText\":\"\"}]},\"subCategories\":[]},{\"URL\":\"\\\/outdoor\\\/power-equipment-on-sale.html\",\"displayText\":\"Weekly Specials\",\"sectionLinks\":{\"columns\":\"6\",\"linkItems\":[{\"URL\":null,\"imageURL\":null,\"displayText\":\"\"}]},\"subCategories\":[]},{\"URL\":\"https:\\\/\\\/www.ecomfort.com\\\/\",\"displayText\":\"HVAC at eComfort.com\",\"sectionLinks\":{\"columns\":\"6\",\"linkItems\":[{\"URL\":null,\"imageURL\":null,\"displayText\":\"\"}]},\"subCategories\":[]}],\"USP\":[{\"id\":\"479\",\"URL\":\"\\\/stories\\\/479-How-To-Get-Free-Shipping-On-Power-Equipment.html\",\"className\":\"icon-nav-usp-shipping\",\"displayText\":\"Free Shipping\"},{\"id\":\"359\",\"URL\":\"\\\/stories\\\/359-Serious-Power-Equipment-Worth-Bragging-About.html\",\"className\":\"icon-nav-usp-reviews\",\"displayText\":\"Expert Recommendations\"},{\"id\":\"1261\",\"URL\":\"\\\/stories\\\/1261-Power-Equipment-Direct-Credit-Made-Simple.html\",\"className\":\"icon-nav-usp-financing\",\"displayText\":\"Financing\"},{\"id\":\"1991\",\"URL\":\"\\\/stories\\\/1991-New-Customer-Referral-Program.html\",\"className\":\"icon-referral\",\"displayText\":\"Customer Referral Program\"}]}","siteLinkJSON":"{\"Resources\":{\"How to Library\":{\"href\":\"how-to-library.php\",\"title\":\"Power Equipment Direct How-To Library\"},\"Product Reviews\":{\"href\":\"reviews.php\",\"title\":\"Customer Reviews on Power Equipment Direct Products\"},\"Recommendations\":{\"href\":\"stories\\\/359-Serious-Power-Equipment-Worth-Bragging-About.html\",\"title\":\"Product Recommendations\"},\"Weekly Specials\":{\"href\":\"outdoor\\\/power-equipment-on-sale.html\",\"title\":\"Weekly Power Equipment Direct Specials\"},\"Manuals\":{\"href\":\"stories\\\/399-How-to-Access-Old-Power-Equipment-Manuals.html\",\"title\":\"Manual Lookup\"},\"Service Centers\":{\"href\":\"stories\\\/414-How-to-Find-a-Service-Center-For-Your-Power-Equipment.html\",\"title\":\"Service Centers\"},\"Technical Support\":{\"href\":\"stories\\\/425-How-to-Find-Tech-Support-For-Your-Power-Equipment.html\",\"title\":\"Technical Support\"}},\"Account\":{\"My Account\":{\"href\":\"account.php\",\"title\":\"Login to My Account\"},\"Email Preferences\":{\"href\":\"https:\\\/\\\/www.powerequipmentdirect.com\\\/newsletter_removal.php\",\"title\":\"Email Preferences\"},\"Manufacturer Login\":{\"href\":\"https:\\\/\\\/www.powerequipmentdirect.com\\\/partnerships\\\/login.php\",\"title\":\"Manufacturer Login\"}},\"Customer Service\":{\"Help Center\":{\"href\":\"contact_us.php\",\"title\":\"Help Center\"},\"Return Policy\":{\"href\":\"returns.php\",\"title\":\"Return Policy\"},\"Shipping Policy\":{\"href\":\"stories\\\/515-How-to-Easily-Unload-Power-Equipment.html\",\"title\":\"Shipping Policy\"},\"Product Recalls\":{\"href\":\"stories\\\/1175-Product-Recalls-for-Power-Equipment.html\",\"title\":\"Product Recalls\"},\"Track Order\":{\"href\":\"ordertracking.php\",\"title\":\"Order Tracking\"},\"Accessibility\":{\"href\":\"stories\\\/1769-Our-Commitment-to-Accessibility.html\",\"title\":\"Accessibility\"},\"Do Not Sell or
Share My Personal Information\":{\"href\":\"https:\\\/\\\/ferguson.bigidprivacy.cloud\\\/consumer\\\/#\\\/dMf02ovZbN\\\/Form-NHWperWAaFNVIQK\",\"title\":\"Do Not Sell or Share My Personal Information\"}},\"About Us\":{\"Our Stores\":{\"href\":\"https:\\\/\\\/www.powerequipmentdirect.com\\\/our-stores.php\",\"title\":\"Power Equipment Direct's Stores\"},\"Our Story\":{\"href\":\"https:\\\/\\\/www.powerequipmentdirect.com\\\/stories\\\/1982-How-We-Make-Buying-Technical-Products-Simple.html\",\"title\":\"Power Equipment Direct's Story\"},\"Careers\":{\"href\":\"https:\\\/\\\/www.powerequipmentdirect.com\\\/stories\\\/1924-Job-Openings.html\",\"title\":\"Careers @ Power Equipment Direct\"},\"Newsroom\":{\"href\":\"newsreleases.php\",\"title\":\"Power Equipment Direct News Center\"}},\"Contact Us\":{\"phone\":\"800-710-7499\",\"hours\":[\"M-F: 8-5 CST\",\"Sat: Closed\",\"Sun: Closed\"]}}","storeLinkJSON":"{\"AC Wholesalers\":{\"href\":\"https:\\\/\\\/www.acwholesalers.com\",\"title\":\"AC Wholesalers\"},\"Air Compressors Direct\":{\"href\":\"https:\\\/\\\/www.aircompressorsdirect.com\",\"title\":\"Air Compressors Direct\"},\"Chain Saws Direct\":{\"href\":\"https:\\\/\\\/www.chainsawsdirect.com\",\"title\":\"Chain Saws Direct\"},\"Chippers Direct\":{\"href\":\"https:\\\/\\\/www.chippersdirect.com\",\"title\":\"Chippers Direct\"},\"eComfort\":{\"href\":\"https:\\\/\\\/www.ecomfort.com\",\"title\":\"eComfort\"},\"Electric Generators Direct\":{\"href\":\"https:\\\/\\\/www.electricgeneratorsdirect.com\",\"title\":\"Electric Generators Direct\"},\"Leaf Blowers Direct\":{\"href\":\"https:\\\/\\\/www.leafblowersdirect.com\",\"title\":\"Leaf Blowers Direct\"},\"Log Splitters Direct\":{\"href\":\"https:\\\/\\\/www.logsplittersdirect.com\",\"title\":\"Log Splitters Direct\"},\"Mowers Direct\":{\"href\":\"https:\\\/\\\/www.mowersdirect.com\",\"title\":\"Mowers Direct\"},\"Power Equipment Direct\":{\"href\":\"https:\\\/\\\/www.powerequipmentdirect.com\",\"title\":\"Power Equipment Direct\"},\"Pressure Washers Direct\":{\"href\":\"https:\\\/\\\/www.pressurewashersdirect.com\",\"title\":\"Pressure Washers Direct\"},\"Snow Blowers Direct\":{\"href\":\"https:\\\/\\\/www.snowblowersdirect.com\",\"title\":\"Snow Blowers Direct\"},\"String Trimmers Direct\":{\"href\":\"https:\\\/\\\/www.stringtrimmersdirect.com\",\"title\":\"String Trimmers Direct\"},\"Sump Pumps Direct\":{\"href\":\"https:\\\/\\\/www.sumppumpsdirect.com\",\"title\":\"Sump Pumps Direct\"},\"Tillers Direct\":{\"href\":\"https:\\\/\\\/www.tillersdirect.com\",\"title\":\"Tillers Direct\"},\"Water Pumps Direct\":{\"href\":\"https:\\\/\\\/www.waterpumpsdirect.com\",\"title\":\"Water Pumps Direct\"}}","socialLinkJSON":"{\"Facebook\":{\"href\":\"https:\\\/\\\/www.facebook.com\\\/PowerEquipmentDirect\",\"icon\":\"icon-facebook\",\"title\":\"Facebook\"},\"Twitter\":{\"href\":\"http:\\\/\\\/twitter.com\\\/PowerEquipment\",\"icon\":\"icon-twitter\",\"title\":\"Twitter\"},\"Pinterest\":{\"href\":\"http:\\\/\\\/pinterest.com\\\/powerequipment\\\/\",\"icon\":\"icon-pinterest\",\"title\":\"Pinterest\"},\"YouTube\":{\"href\":\"http:\\\/\\\/www.youtube.com\\\/PowerEquipmentDirect\",\"icon\":\"icon-youtube\",\"title\":\"YouTube\"},\"Instagram\":{\"href\":\"https:\\\/\\\/www.instagram.com\\\/powerequipmentdirect\\\/\",\"icon\":\"icon-instagram\",\"title\":\"Instagram\"},\"LinkedIn\":{\"href\":\"https:\\\/\\\/www.linkedin.com\\\/company\\\/power-equipment-direct\\\/about\\\/\",\"icon\":\"icon-linkedin\",\"title\":\"LinkedIn\"}}","miscLinkJSON":"{\"Terms of Use\":{\"href\":\"terms-of-use.php\",\"title\":\"Terms of Use\"},\"Privacy Policy & Security\":{\"href\":\"privacy.php\",\"title\":\"Privacy Policy and Security\"},\"Cookie Policy\":{\"href\":\"privacy.php#cookiePolicy\",\"title\":\"Cookie Policy\"},\"CA Privacy Rights\":{\"href\":\"privacy.php#californiaPrivacyRights\",\"title\":\"CA Privacy Rights\"},\"copyright\":\"© 2024 Power Equipment Direct. All Rights Reserved\"}","checkoutMiscLinkJSON":"{\"Privacy Policy & Security\":{\"href\":\"privacy.php\",\"title\":\"Privacy Policy and Security\"},\"Cookie Policy\":{\"href\":\"privacy.php#cookiePolicy\",\"title\":\"Cookie Policy\"},\"Terms of Use\":{\"href\":\"terms-of-use.php\",\"title\":\"Terms of Use\"},\"copyright\":\"© 2024 Power Equipment Direct. All Rights Reserved\"}","expertJSON":{"imageURL":"https:\/\/www.powerequipmentdirect.com\/images\/experts\/expert-main-13.png","href":"\/product-experts.php?s=13","title":"Contact Dale @ Power Equipment Direct","expertName":"Dale","expertTitle":"Power Equipment Expert"},"bbbJSON":{"imageURL":"https:\/\/www.powerequipmentdirect.com\/images\/badge-bbb.png","imageAlt":"Better Business Bureau","href":"http:\/\/www.bbb.org\/chicago\/business-reviews\/industrial-equipment-and-supplies\/power-equipment-direct-in-bolingbrook-il-57001088","title":"Power Equipment Direct - A+ Rating - Better Business Bureau"},"zipCode":null,"phoneNumber":"800-710-7499","loginToken":"page cache precludes the use of csrf tokens","iterable":"e4b27e68b9c84fbb940829a0a9ee29d7","newNav":false}
We Make Buying Technical Products Simple
Free Shipping On Power Equipment
Lower 48
Free Shipping On Power Equipment
Lower 48


_685c809ebd888dcce7bd3a78df9e986e.jpg)